GL.iNet GL-AX1800 Router Setup
Generally, GL.inet routers are trendy portable networking devices that are available as personal mini routers and mesh systems. Similarly, to make the most of these handy gateways, GL.iNet GL-AX1800 router setup is a must. After that, you can set the device according to your preferences.
Further, to access and set up this networking device, you can use the web GUI and the app. Therefore, to help you with the entire GL.iNet Flint router setup process, we share this brief guide with you. From primary necessities to troubleshooting tips, everything you get here is in detail, so keep reading!
Primary Essentials for GL.iNet GL-AX1800 Flint Setup
While you are moving with the setup process of your GL.inet gateway, then ensure to have the below-mentioned things with you:

Active internet connection

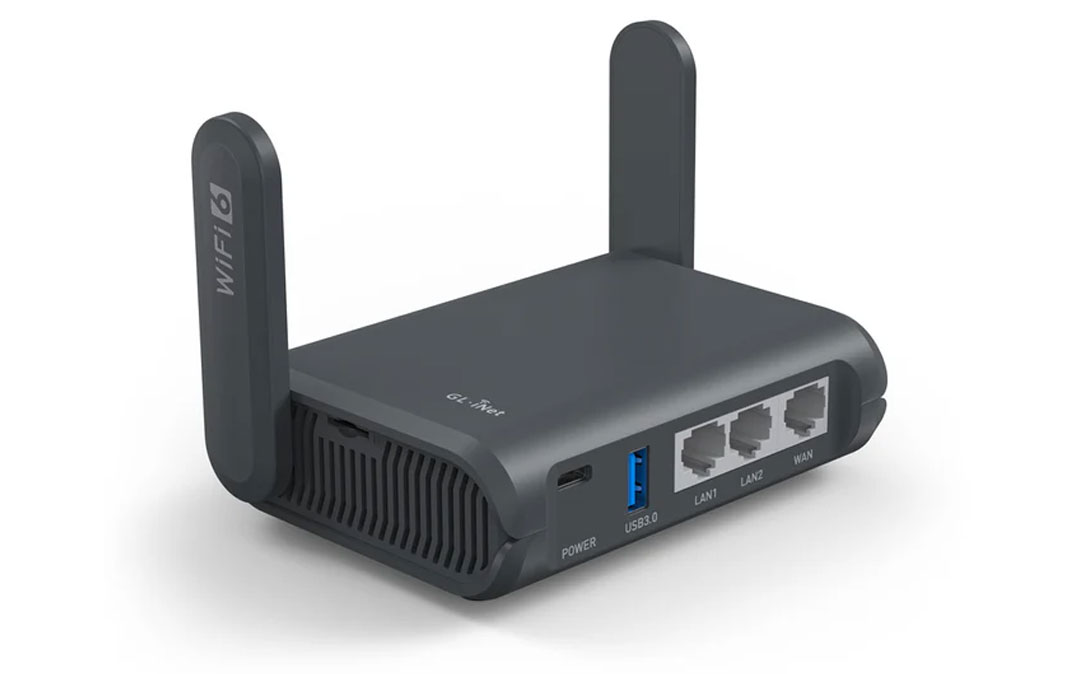
GL.iNet GL-AX1800 Flint router

Web/IP address
Valid admin details

Glinet app

Computer or smartphone
How to Execute the GL.iNet GL-AX1800 Router Setup?
Moreover, when you get ready with the necessary things, then move on to the configuration procedure using the web address or the app method remember steps are different due to the procedure you choose, here we are pointing out the detailed steps for each process, take a look once:

GL-AX1800 Flint Setup Via Web GUI
- First of all, turn on your wifi router.
- Now, join the available GL.inet network using your computer/laptop.
- After that, open the web browser on your Windows and write down the 192.168.8.1 IP address in the browser bar.
- Here, a GL.iNet GL-AX1800 login window appears to you, so mention the valid admin credentials on the login window.
- After that, you land on the smart dashboard of the networking device.
- Next, choose the language, and time zone, first.
- Afterward, change the network name (SSID) and password by visiting the Wireless settings section on the admin panel.
- Further, you are prompted to set an Admin password for your networking device as there is no default password set for it.
- Also, you can configure the Firewall, VPN, and Firmware Update settings on the admin panel.
- Hence, follow the on-screen guidelines to carry out the particular settings for the section you have selected.
- In the end, you now complete the GL.iNet GL-AX1800 WiFi 6 router setup process efficiently.
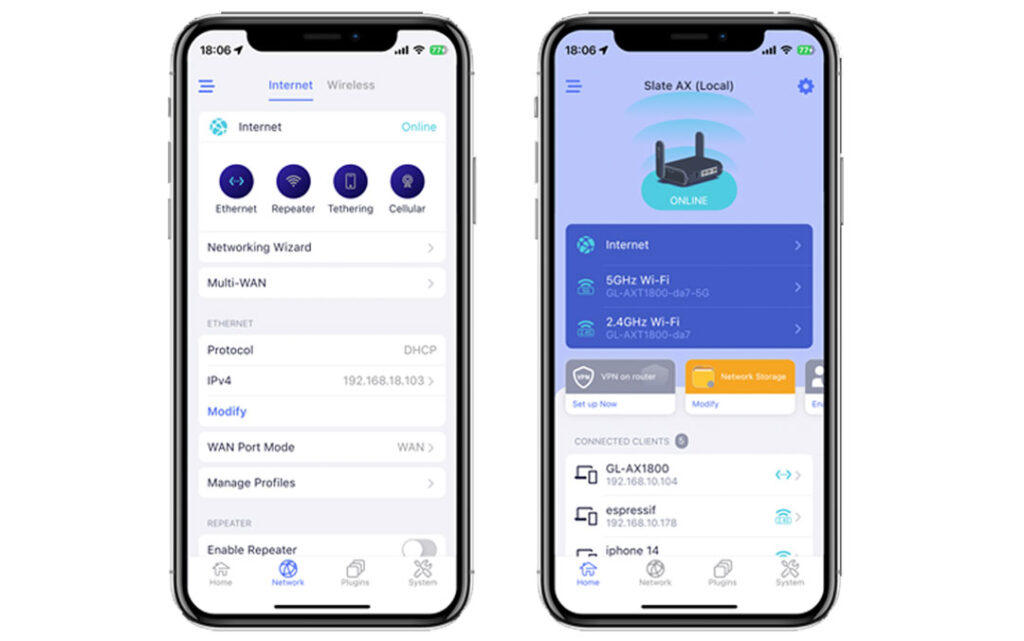
GL.iNet Flint Setup Through the App
- To start with, turn on your networking device.
- Now, connect your smartphone to the GL.inet router’s internet.
- Further, check that you are using the upgraded version of the Glinet app on your mobile device.
- Next, open the app and you are presented with a GL.iNet login screen.
- Hereon, click Login Good Cloud and mention the admin details.
- After that, you reach the advanced admin panel of the GL.iNet GL-AX1800 Flint router.
- Here, follow the in-app instructions to configure the Basic and Advance settings.
- At last, click on Apply/Save to implement the modified settings.
Face Issues With GL.iNet GL-AX1800 Router Setup? Here Are the Fixes!
Furthermore, the configuration procedure is simple for the GL.iNet GL-AX1800 router but sometimes, users get stuck with it. However, this may happen due to inaccurate admin details, web/IP address, device incompatibility, enabled security extensions, browser/app issues, etc.
Moreover, to overcome these problems, we shed light on some effective troubleshooting tips in this section. Therefore, find the problem with your networking gateway first and then select the appropriate solutions from the list below:
- Firstly, ensure that you use the correct web/IP address and admin credentials while accessing the GL.iNet GL-AX1800 login page.
- Make sure that your smartphone/computer/laptop is connected to the GL.inet router’s network.
- Ensure that the smart device you are using to access the web address or the app is compatible enough.
- To get rid of the technical glitches and bugs, restart the GL.inet router.
- Delete the unnecessary browser data and see if it supports the given web address or not. If not, then move to another browser.
- Make sure you are using an updated version of the GLinet app on your smartphone and that all the necessary permissions are enabled.
- Confirm that the router’s internet is stable otherwise use an ethernet cable as a wired connection to stabilize it.
- Temporarily disable the security software on the router for the time being until you complete the GL.iNet GL-AX1800 router setup process. After that, you can re-enable them.
- If the router gets bricked, then check and change the hardware or networking device itself if needed.
- Eliminate the signal interferences, like furniture, mirrors, baby monitors, etc.
- Make sure your gateway runs on the latest software otherwise access the admin panel and check if the window prompts for an update. If yes, then follow the guidelines to upgrade it.
- If the issue network persists, you must contact your network service provider.
- When none of the above mentioned methods work, then factory reset GL.iNet Flint Router. This method will revert your networking device to its default settings.
How to Perform GL.iNet GL-AX1800 Flint Firmware Update Manually?
Generally, firmware update is a necessary part of the optimal router functioning. However, an outdated file will cause several issues, such as network disconnectivity, slower performance, etc. So, it is important to run upgraded software on your networking device.
Additionally, there are two ways for GL.iNet GL-AX1800 Flint firmware update, i.e. Local Upgrade and Auto Upgrade. Here, we highlight the detailed steps for the manual firmware update for your GL-AX1800 gateway using the Local Upgrade method. So, take a closer look beneath:
- Initially, connect your Windows system to the GL-AX1800 router’s network.
- You can use a wired connection or directly join this network as a wireless connection.
- Further, visit the official site and download the latest released firmware file according to the GL.iNet Flint Router model that you use.
- Now, store this file on your computer in a new folder where you can easily find it.
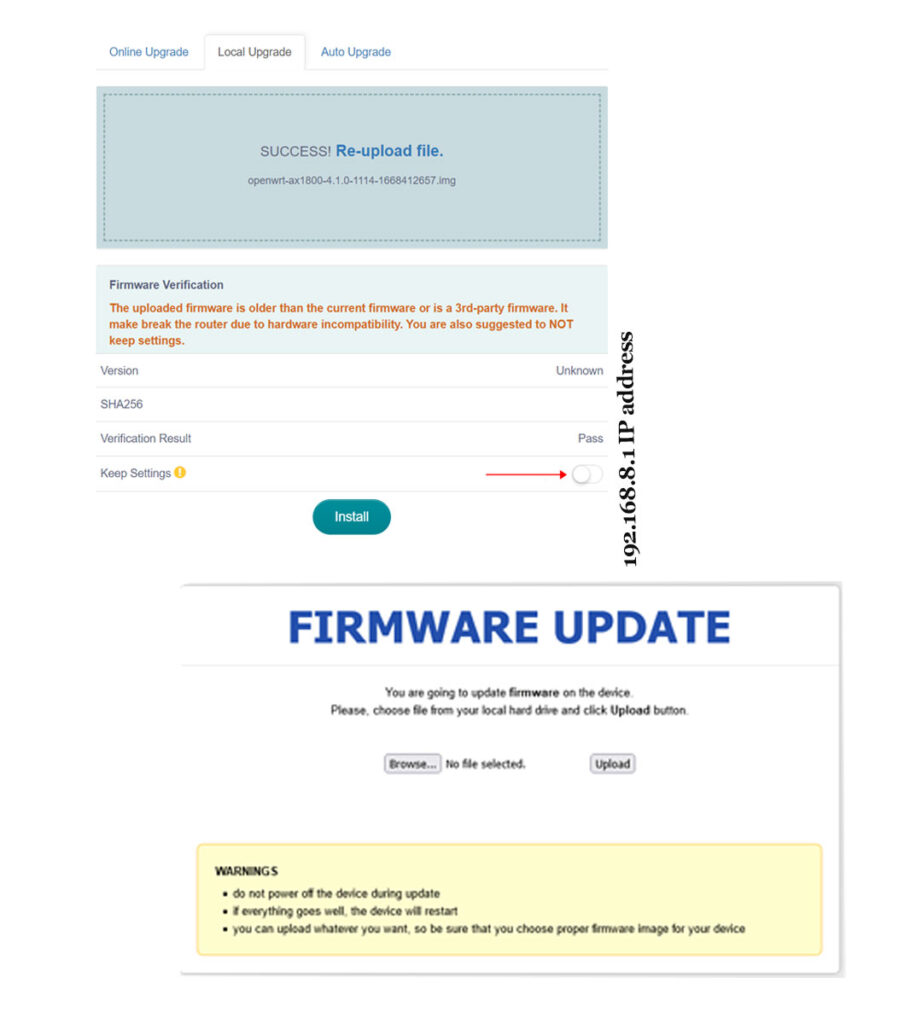
- After that, open the web browser and type in the 192.168.8.1 IP address in the URL bar of the router.
- Next, mention the valid user details on the login window that appears to you.
- After logging in, you land on the smart setup dashboard of the gateway.
- Herein, visit the Upgrade>Local Upgrade>Drag the downloaded file>install.
- When installation gets complete, the Success notification appears on the screen.
- Again, log in to your GL.iNet router and click on Upgrade.
- Here, visit Online Upgrade and the Firmware version is shown to you.
- Ensure your router now runs on the latest software otherwise, repeat the process from scratch.
- At last, you are done with the GL.iNet GL-AX1800 Flint firmware update procedure.
Overall, the above information will guide you through the detailed GL.iNet GL-AX1800 Router Setup through various methods. Want to know more? Check us out!